Unbricking the PICkit3
 So I’ve bricked my PICkit3. The PICkit 3 v3 application crashed while loading new firmware into the PICkit3, and it ended up bricked. It still got recognized by the host computer as a PICkit3 USB device, but with an empty serial number. The Power, Active and Status LEDs stayed on and I couldn’t load any more firmware. So I had to unbrick it. Ironically to do this you’ll need another PICkit programmer. I used my spare PICkit2.
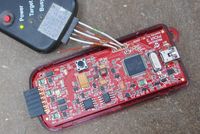
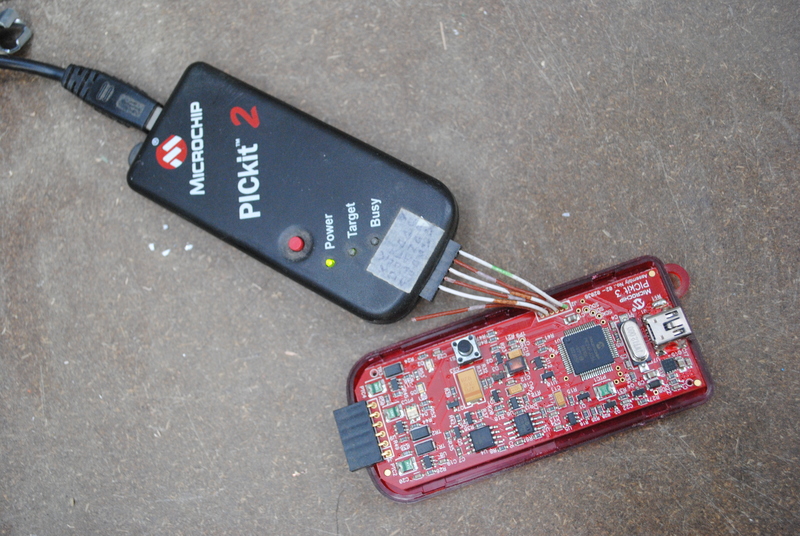
Connect the spare PICkit to the bricked programmer
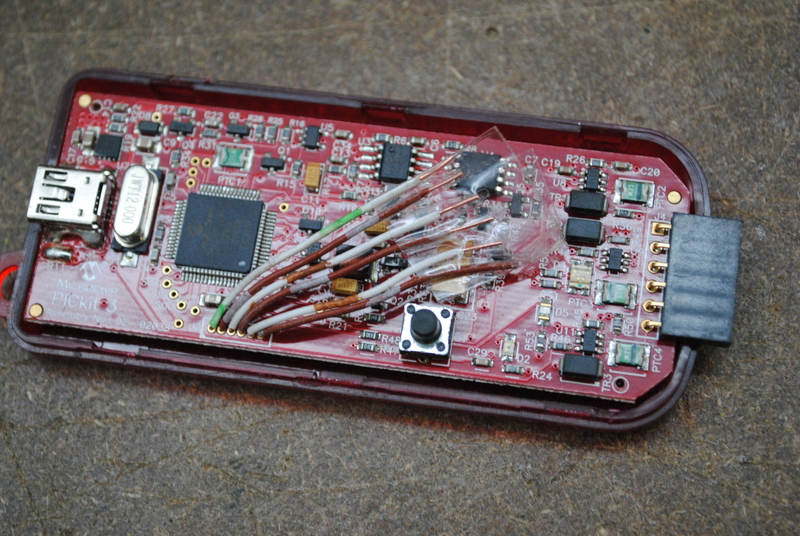
The PICkit3’s case doesn’t have any screws, it is kept closed by tabs. So first order of business is to pry open 3 tabs on one side of the case, and you’ll be able to snap it open.
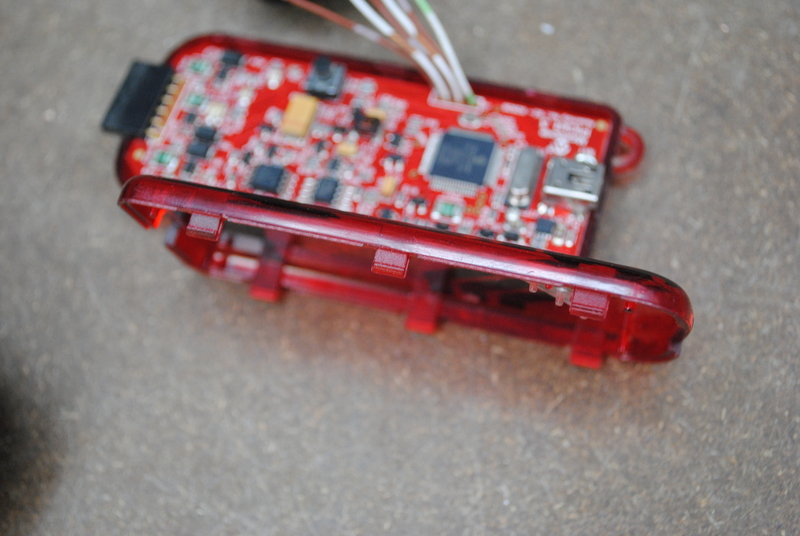
Inside you’ll find a small PCB with a PIC 24 microcontroller. Next to this microcontroller is J2, a row of 6 pads that can be used to program this microcontroller. Since the pitch of J2 is smaller than the 2.54mm header required by the PICkit’s programming header, we’ll need connect a 6-pin 2.54mm pinheader to it using wires. Or you omit the pinheader and just stick the wires into the spare programmer’s female header as I did. The small notch on the silkscreen of J2 is the MCLR/VPP pin. Make sure you get the pins in the right order. The pinout is the same as the one on the PICkit’s programming header (MCLR/VPP, VDD, GND, PGD, PGC, AUX). The AUX pin doesn’t need to be connected.
If you make the wires 2 or 3 cm long, you can leave the pinheader into the case of the PICkit when you’ve finished unbricking it.
Reprogram the firmware
Now we’ll overwrite the bricked firmware with good firmware. Start up your PICkit stand-alone application. I’m using the PICkit2, so I’ll be using the PICkit2 Programmer v2.61 programmer application in this example.
First select the PIC24 from the Device Family menu. Perhaps the application has already detected it at startup.
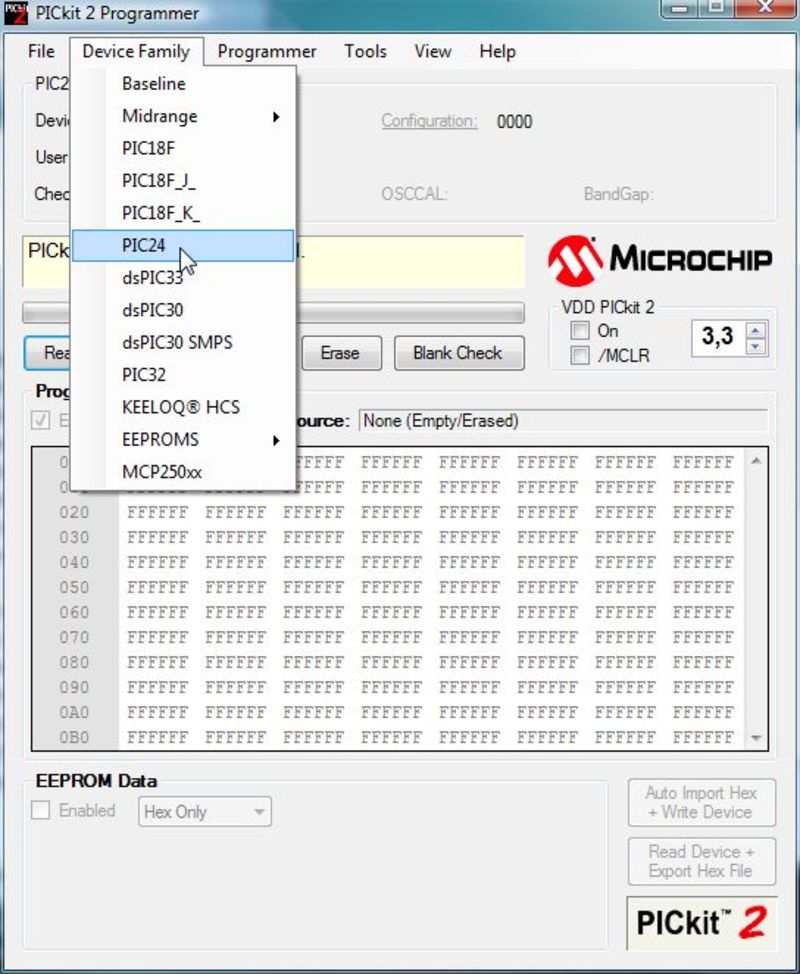
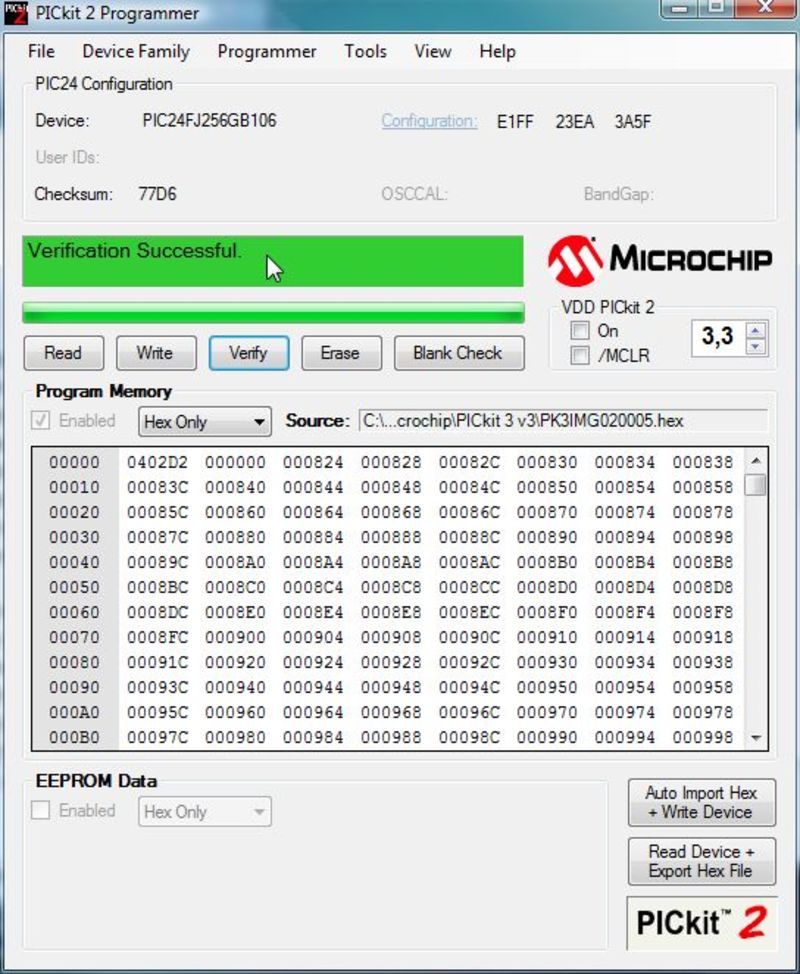
If this works then the application will show PIC Device Found. in it’s status window. The PICkit3 contains a PIC24FJ256GB106 device.
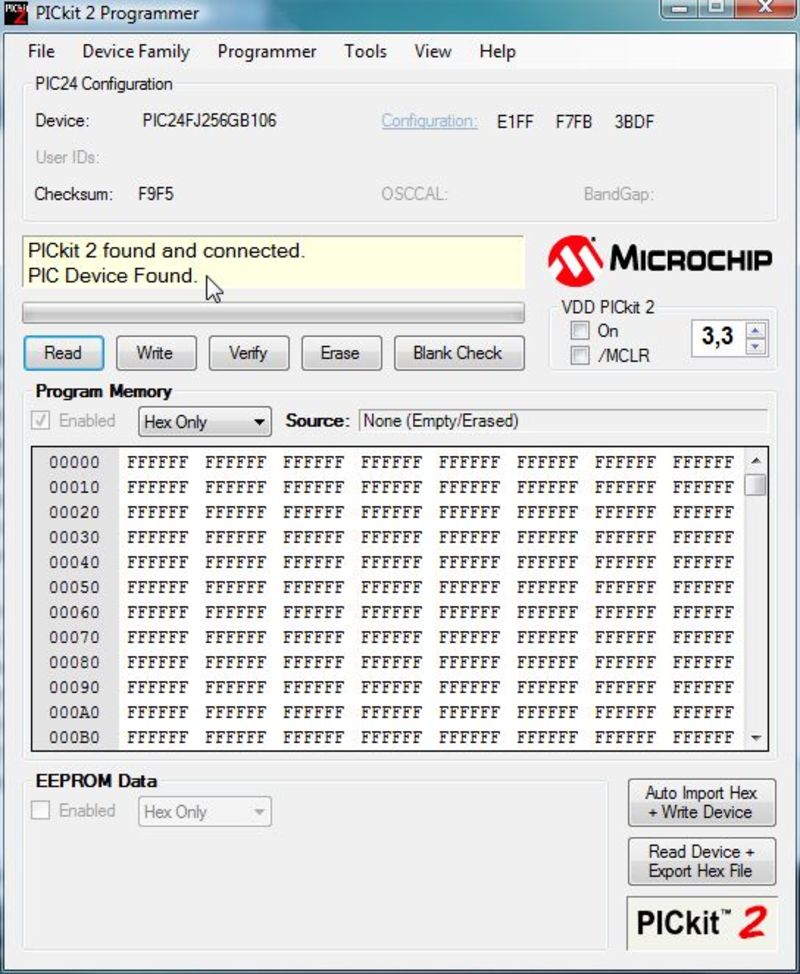
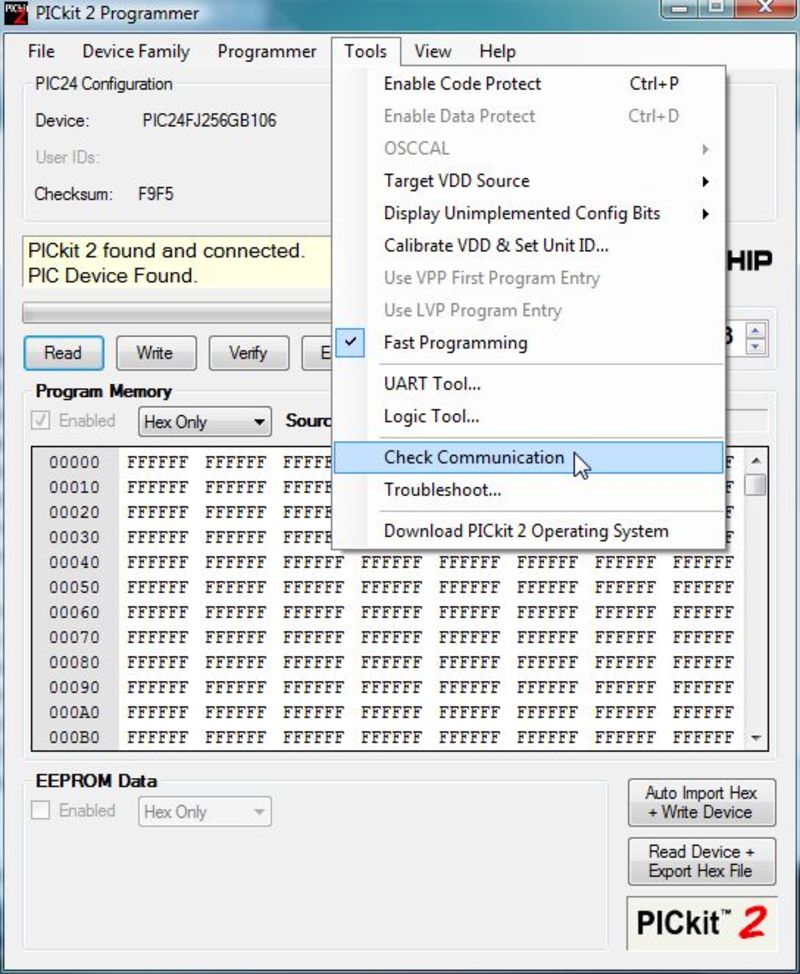
If not then you can check if the microcontroller reponds using the Check Communication command from the Tools menu.
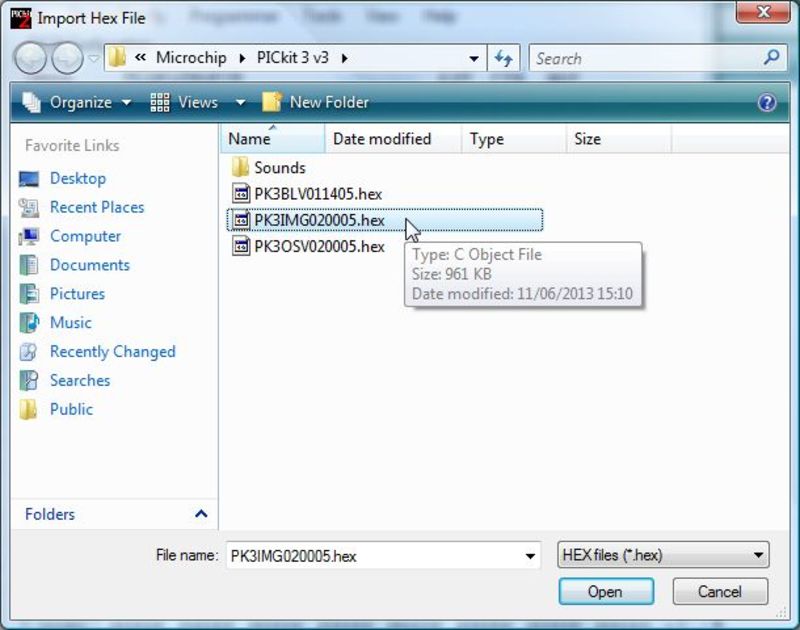
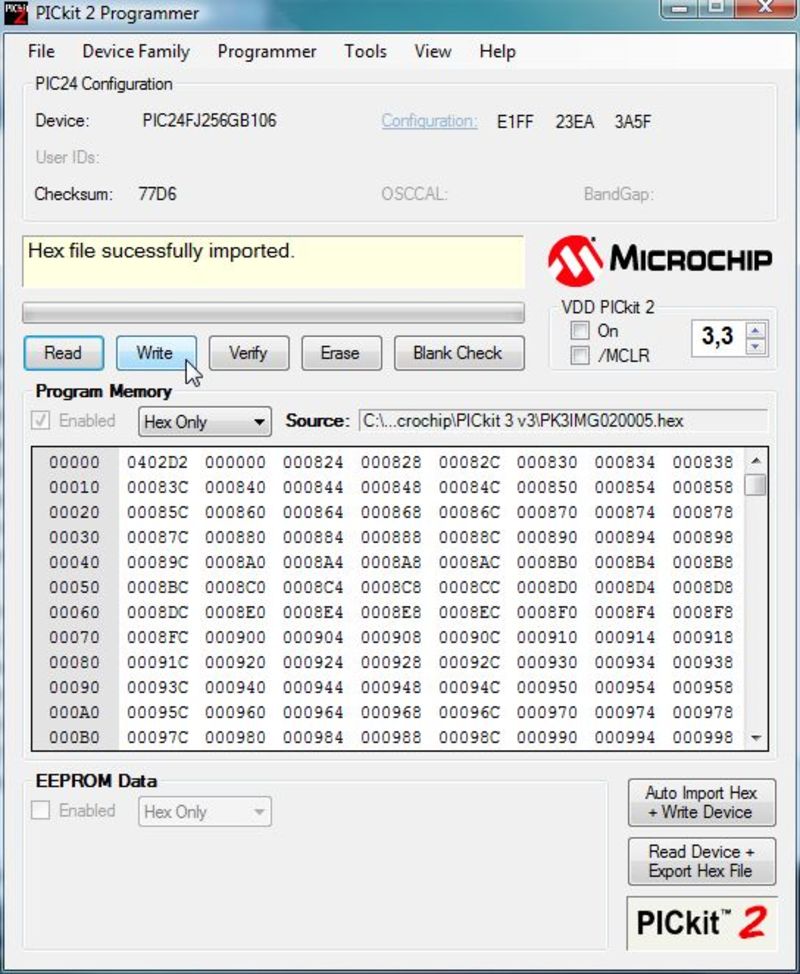
The firmware to program into the bricked PICkit3 is called PK3IMG020005.hex. It is located in the PICkit3 v3 application folder (typically c:\Program Files\Microchip\PICkit3 v3).
Select it and hit the Open button.
The firmware should now be loaded into the programming application, as witnessed by the text Hex file sucessfully imported. Its checksum should be 77D6.
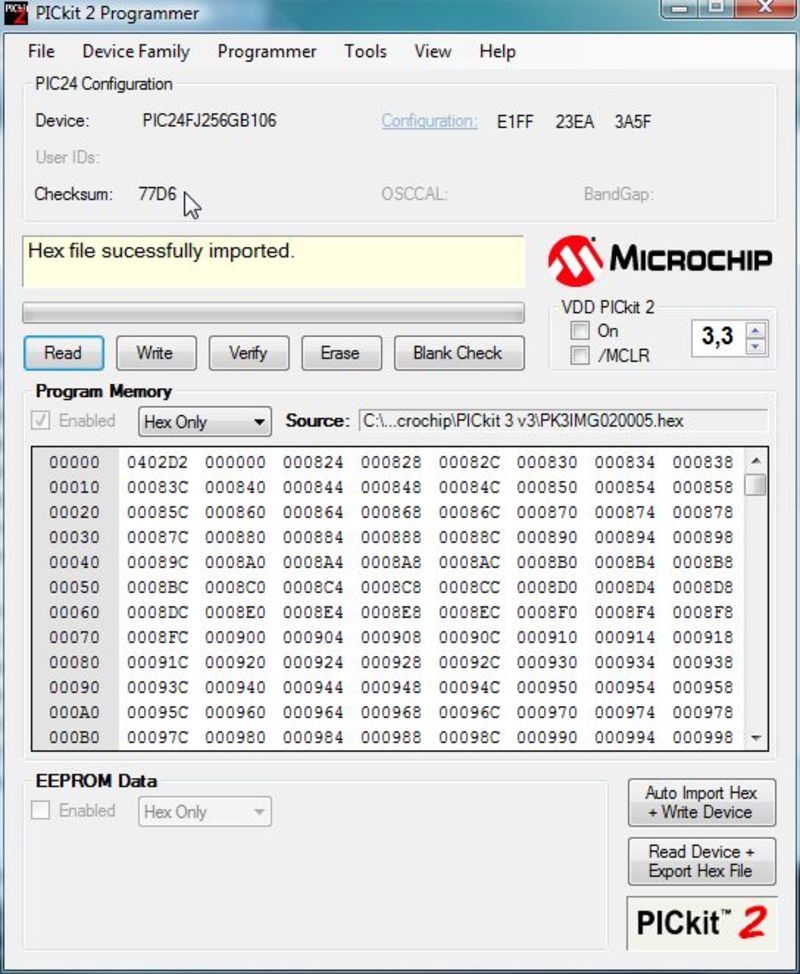
Now hit the Write button to program the file into the PICkit3’s microcontroller.
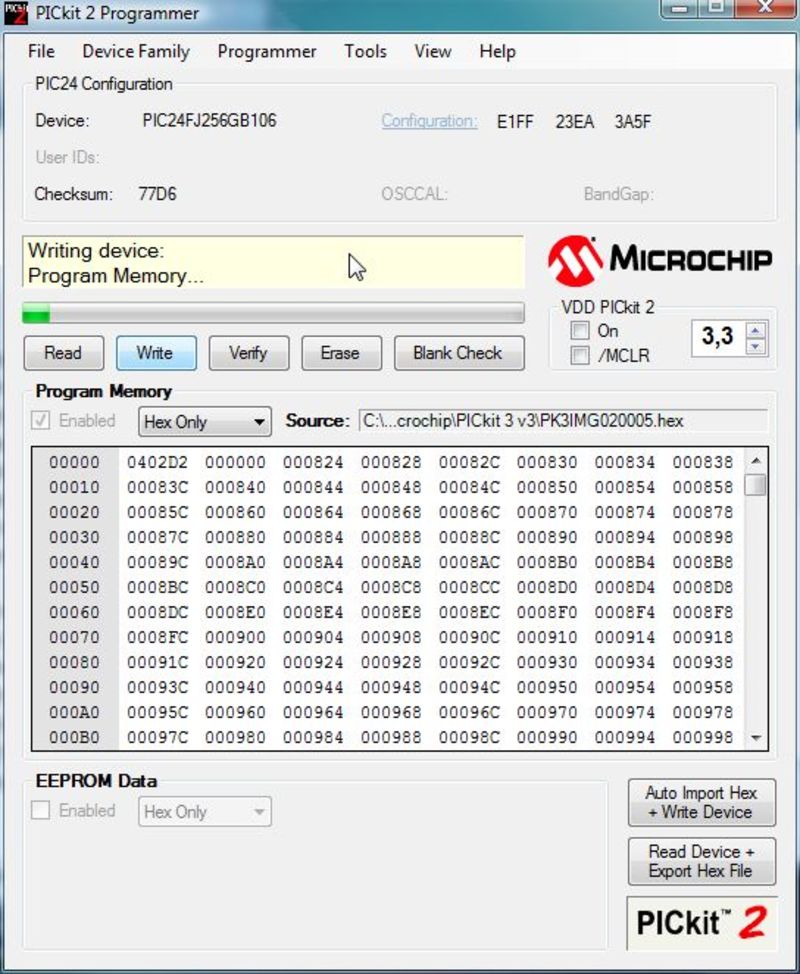
You should now see the application programming the PIC, on the PICkit2 the Busy LED should be on.
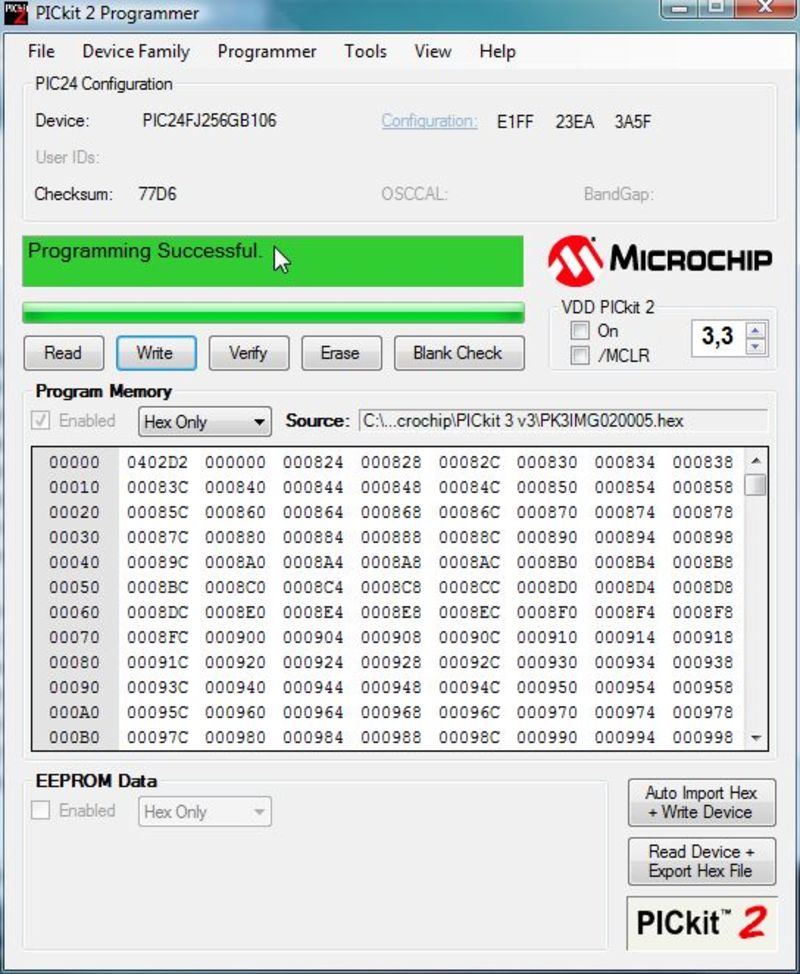
If programming went well, the status window’s background should be green and should say Programming successful.
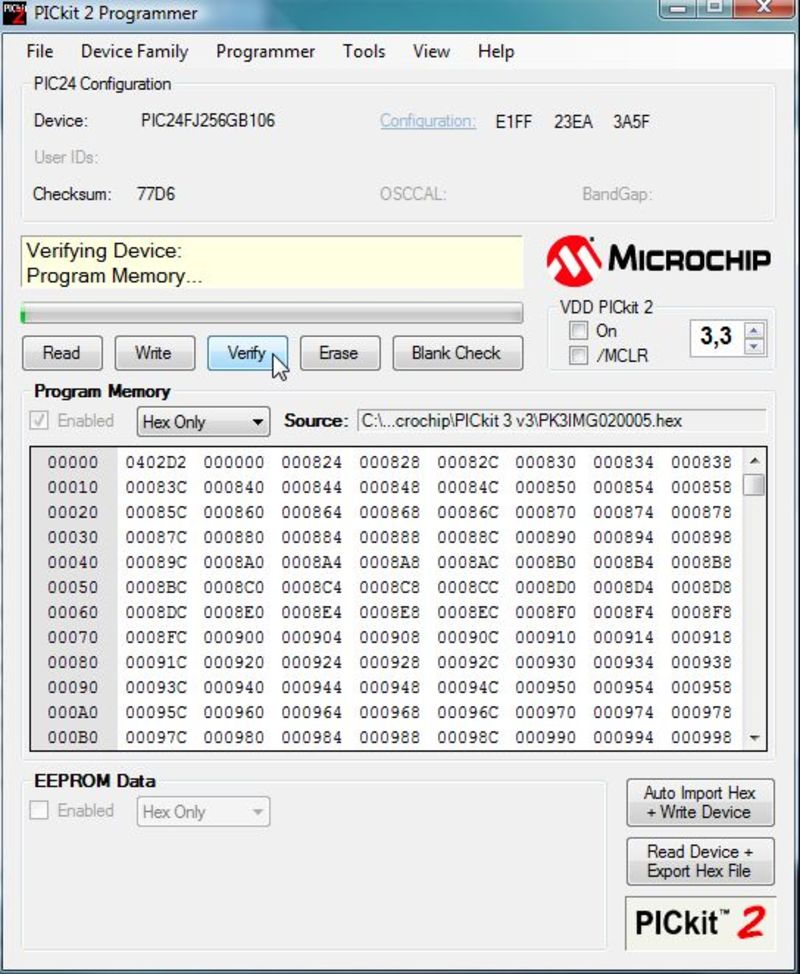
If you’re paranoid and want to check if the firmware in the PICkit3 matches the one in the file we loaded, you can click the verify button.
Now the PICkit3 is unbricked.
Let’s close up the case. I’ve insulated the wires with some clear tape, and folded the wires back against the PCB.
The case can now be snapped closed. The pinheader stays in the enclosure, waiting for the next time we brick the programmer.

Testing the unbricked PICkit3
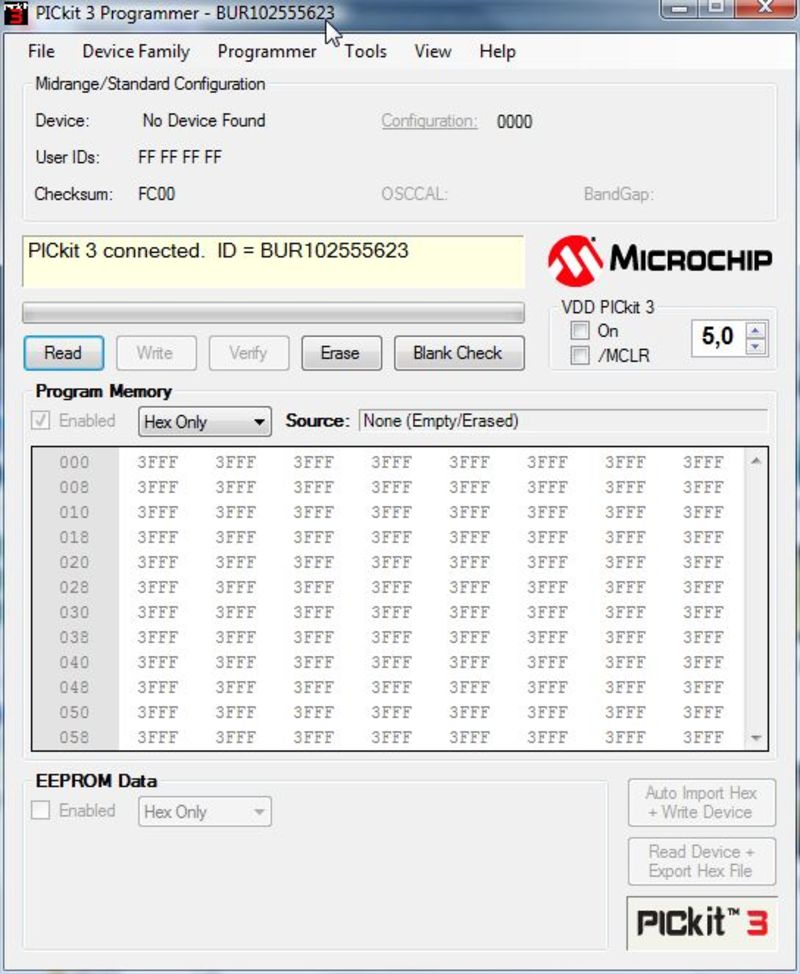
Now connect the unbricked PICkit3 to the USB cable and fire up the PICkit3 v3 Programmer application. It should detect the PICkit3 and show its ID. Since this is the application that bricked my PICkit3, I will leave it alone.
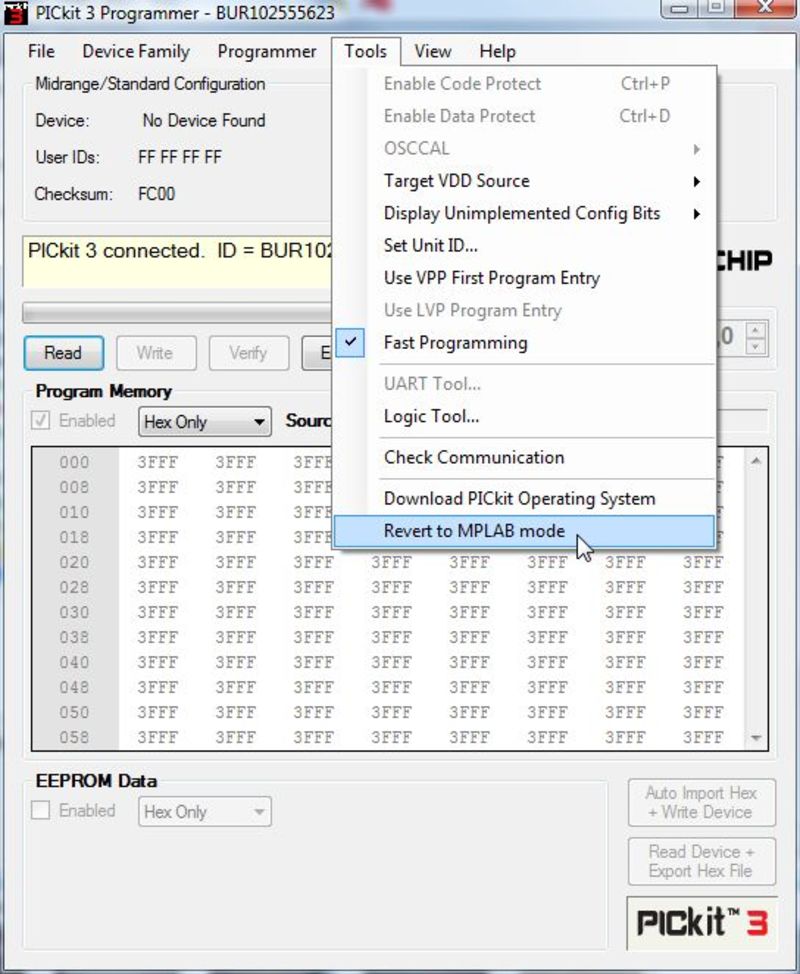
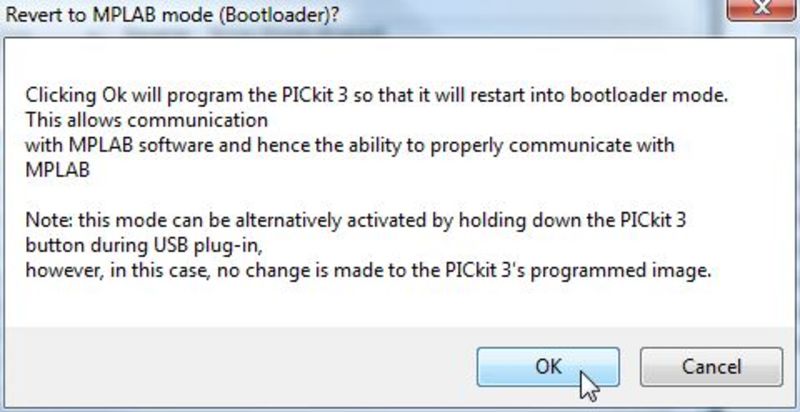
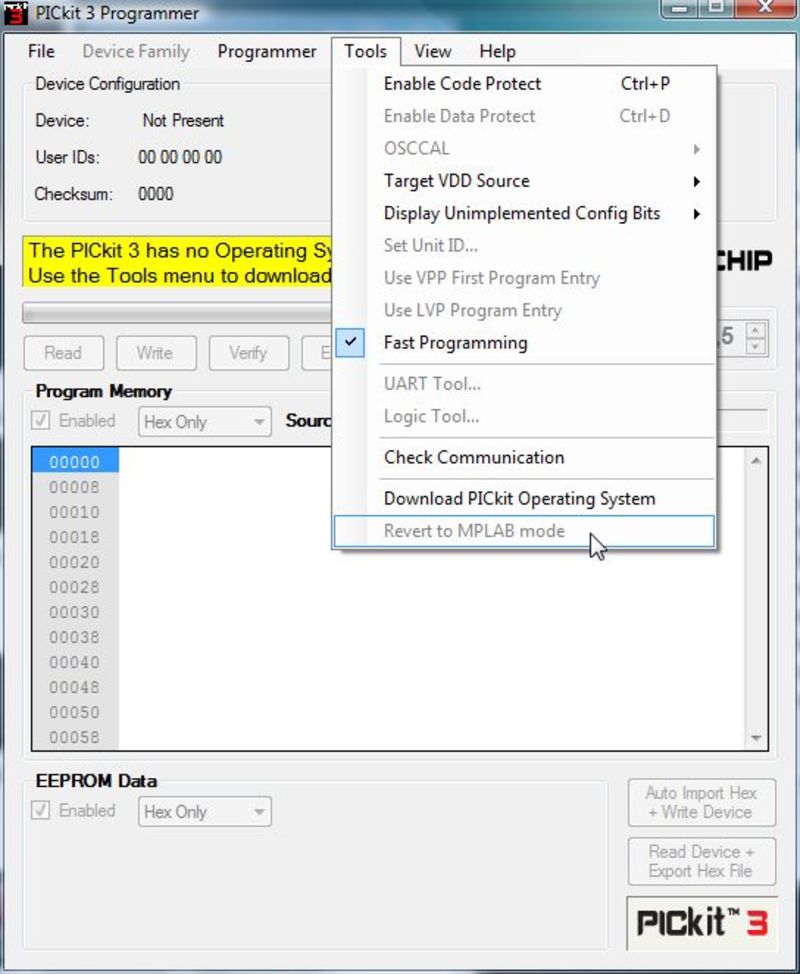
But first we’ll need to revert the firmware back to MPLAB mode so MPLAB can talk to the PICkit3.
If you re-start the PICkit3 programming application, it should say that “the PICkit3 has no Operating System”.
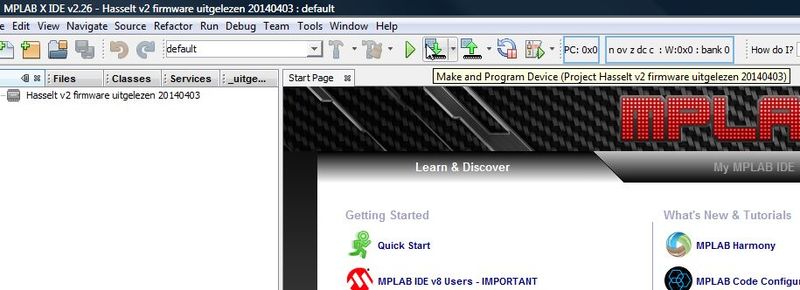
I’ll be using MPLAB X to do a test of programming a HEX file into a PIC18F25K80.
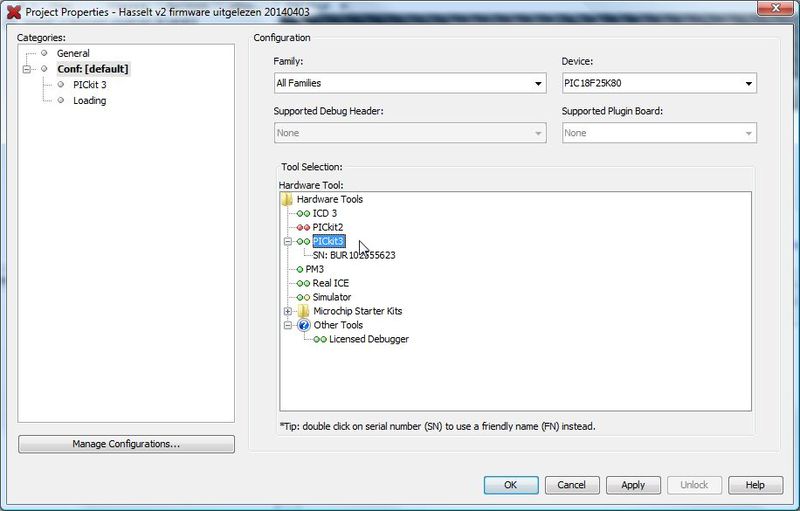
The PICkit3 should show up in the project’s conf menu.
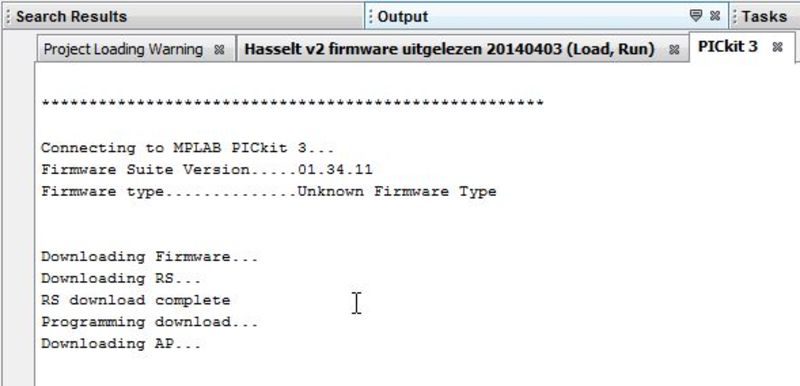
MPLAB will download new firmware into the PICkit3 which is suitable for the target device, as shown in its Output window. The PICkit’s Status LED will be flashing.
Then MPLAB will proceed to program the PIC.
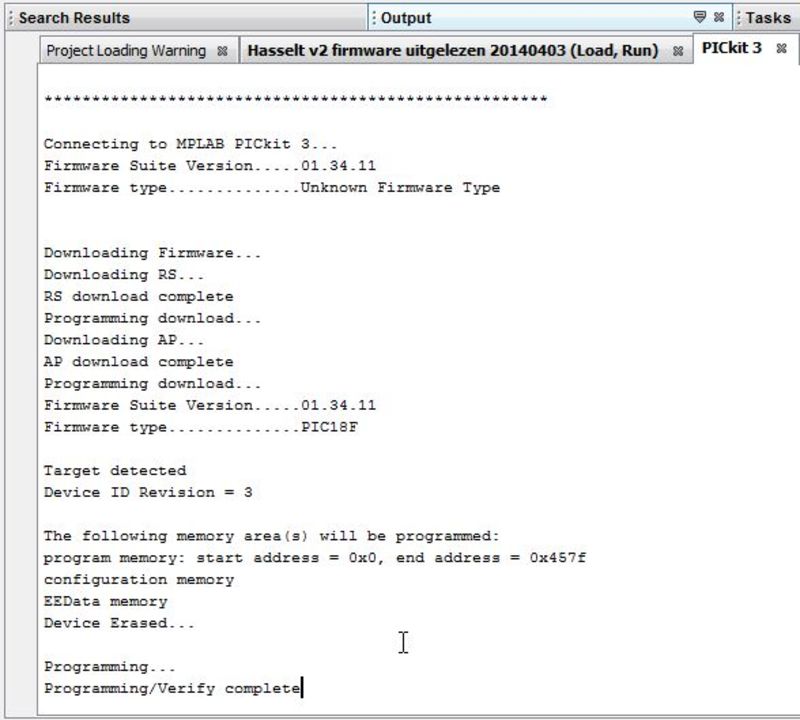
Success!
Resources
- PICkit3 v3 firmware.zip (I suggest you try the ones in your PICkit 3 V3 folder first)